
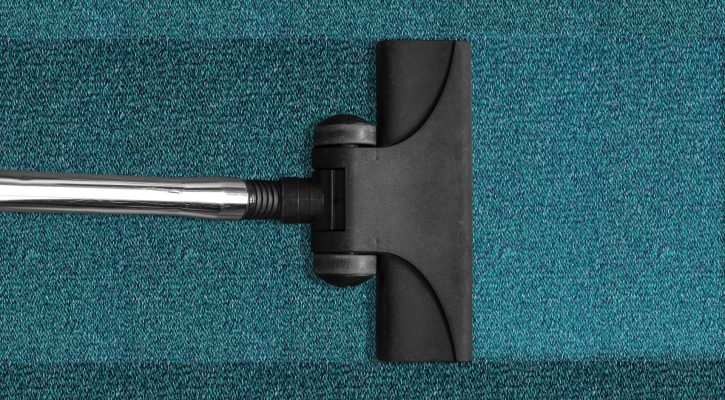
Bästa fördelarna att använda sträckfilm som emballage
September 30, 2022
Stäckfilm är ett överlägset emballage
Stäckfilm håller produkten fri från fukt, damm och smuts. Fraktskadorna är minimala. Om UVI (Ultra Violet Inhibitor) stäckfilm används som emballage så skyddar det föremålet från ultravioletta strålar. Förutom att dölja föremålets innehåll minskar stäckfilm risken också risken för stöld.
Stäckfilm är kostnadseffektivt emballage
Stäckfilm är ett bättre alternativ till stroppning eller värmekrympfilm. Maskinen, stretch wrap-utrustning, är billigare jämfört med de andra alternativen och även vad gäller mängden energi som förbrukas.
Stäckfilm är effektivt
Eftersom det är lätt att slå in varorna, ökar produktiviteten hos arbetarna. Stäckfilm kan återvinnas. Det finns många typer av omslagsfilmer för att passa dina specifika krav.
Blown Stretch Films
Denna typ av film används på högkraftsprodukter eftersom de har överlägsen punkteringsmotstånd.
Handstäckfilm
Denna film är också känd som handinpackning, pallomslag eller handstäckfilm. Handstäckfilm används vanligtvis när föremålets vikt är mindre. Anledningen är att handlindning är en extremt tidskrävande uppgift eftersom det måste göras manuellt. Om det inte görs på ett lämpligt sätt kan det också orsaka skada på de inslagna föremålen.
Konverterade filmer
Denna typ av film sträcks innan produkten/föremålet slås in. Konverterade filmer är inte bara starka utan kan också återvinnas. Bortsett från det krävs inte många varv av filmen för att linda in lasten. Detta innebär att du inte bara sparar tid utan också undviker slöseri med film.
Cast Stretch Film
Även känd som en gjuten film eller gjutet omslag. Filmen har en fantastisk yta som är glansig och slätt. Filmen har också utmärkt rivhållfasthet.
Machine Stretch Film
För att slå in ett föremål med denna typ av omslagsfilm behöver du en stretchinpackningsmaskin. Några av fördelarna med att använda maskinsträckfilm jämfört med handsträckfilm är den minskade materialkostnaden, användarvänligheten och säkerheten. Dessutom är föremålen bättre säkrade tack vare det detta effektiva emballage.
Hur du lägger textilplattor
March 22, 2022
Kontrollera din leverans noga:
Kolla igenom leveransen noggrant så att du fått just de textilplattor du beställ. Är du det mista osäker så ska du höra av dig till din leverantör. Det är tråkigt att allt för sent upptäcka att plattorna inte har just den där nyansen du ville ha, eller att strukturen är annorlunda mot det du önskade. Det är faktiskt vanligare än man tror, man är så koncentrerad på att lägga golvet så man inte upptäcker att man fått fel textilplattor.
Är allt helt och snyggt?
Innan du börjar med att lägga dina textilplattor så bör du kontrollera hela leveransen. Det kan hända att dina textilplattor har skönhetsfel som uppkommit vid tillverkningen, lagerhållning, paketering eller så har dom kanske skadats i transporten.
Kolla så din leverans är från samma Batch
Det är viktigt att alla plattorna kommer från samma tillverkningsbatch. Om textilplattorna inte kommer från samma tillverkningsbatch kan de skilja sig åt i kulör. Det kan även förekomma variationer i färgerna på plattor från samma tillverkningsbatch. Avviker färgerna allt för mycket ska du kontakta din återförsäljare.
Låt textilplattorna vila
Om du fått skönhetsfel på dina textilplattor som kan relateras till packning och lagerhållning så kan dessa skador försvinna efter att textilplattorna fått vila en stund. Packa upp textilplattorna och låt dem ligga några timmar, då ger du fibrerna i textilplattorna tid att återhämta sig och resa sig upp. Om skönhetsfelen inte försvinner så kontaktar du din återförsäljare.
Förvara dina textilplattor
Om du inte ska lägga textilplattorna direkt utan förvara dem tills det är dags att lägga dem så bör du förvara dem platt och under torra förhållanden. Dock inte under 16 grader. Då kan gummit i plattorna krympa.
Låt textilplattorna acklimatisera sig
Innan du lägger plattorna så bör du förvara dem i minst 24 timmar i det rummet som de ska läggas i. Då kommer dina plattor ha samma temperatur och fuktförhållande som ditt rum. Tänk på att det ska vara minst 16 grader i rummet.
Ett bra underlag ger bra resultat
Se till att undergolvet är platt, torrt och rent. Underlaget gör slutresultatet som man brukar säga. Har du ett ojämnt golv så bör du spacklas för ett bra resultat.
Lägg din golv
Gör en plan så plattorna ”avslutas” på ett bra sätt. Helst i mitt av en plattan. Oftast medföljer det beskrivningar på hur du lägger dina plattor för att skapa olika mönster med hjälp av plattornas struktur.

Bli i ditt esse. Lär dig hur du reagerar och agerar i vissa situationer.
February 28, 2022
Agera som om det skulle göra skillnad, det gör det. – William James
Att agera hur vi vill vara skickar vårt en order till vårt undermedvetna att bli det.
Att bli i sitt esse är faktiskt ganska enkelt för människor.
Visualisera vad du vill men släpp din önskan att förvärva det. Det undermedvetna tar bara order, och att bygga denna medvetenhet är en färdighet man kan odla. Ofta “agerar” du som någon annan när du pratar med din mamma kontra din chef, kontra ditt syskon eller underordnade. Inte det att vi behandlar dem olika även om våra upplevda roller undermedvetet stökar till det för oss. De personer som inte motsätter sig detta är de som kan prestera bäst och bli i sitt esse. Så lär dig att agera och agera som du vill bli.
Odla en meditationsövning
“När jag ser tillbaka på mitt liv är jag glad över att ha haft det som de flesta skulle anse det att vara ett framgångsrikt liv, inte bara när det gäller affärer, utan i mina relationer och på många andra sätt.
– Meditation kan påverka ditt liv stort, om den utövas medvetet.
– Du kommer att bli beroende av meditation.
– Det är inte så mycket själva meditationen, utan det meditativa tillstånd det skapar för resten av din dag.
Utöver det odlar det dina inre sinnen vilket leder till insikt och kreativitet. Börja med 5 minuter om dagen och ta det därifrån.
– Beslut kommer att bli tydliga.
– Du kommer att lära dig att förbereda ditt sinne.
– Se det som en utbildning för ditt inre.
– Du kommer bli i ditt absoluta esse.
Uppliva dig själv i de svåraste situationerna som möjligt.
Det bästa skådespeleriet kommer ur dig genom att försätta dig själv i situationer som tvingar dig att agera som den person du försöker bli. Dagarna av lång skolgång och jobbsökande och värdet av meriter och “bli utplockad” är sedan länge förbi. Titta på jobben och marknaden för de jobben. Faktum är att jobb för högskolestudenter inte existerar på ett sätt som de brukade. Jobb finns för människor som kan bevisa sig själva på marknaden. Kunskap är gratis och billigt nu. Få det snabbt och gå vidare för att testa det på marknaden. Resten är bara att bygga upp dig själv till vem du vill bli, vilket är gratis och upp till dig.
Välj en badrumsmatta av god kvalité!
February 9, 2022
Att välja lyxiga handdukar, en lyxig badrumsmatta kan förvandla vilket badrum som helst till ett spa-liknande tillflyktsort. Badlakan är en investering, och att välja den perfekta handduken är en process. På samma sätt är det väl värt att ta sig tid att förstå de olika alternativen när du väljer badrumsmatta-
Abyss badrumsmatta och Habidecor badrumsmatta
En av Fine Linen and Baths signaturserier är Abyss, som är välkänd för sina lyxiga handdukskollektioner av spakvalitet. Abyss gör lyxiga handdukar som matchar systerföretag, Habidecor kollektion av badrumsmattor.
Vad gör en lyxig badrumsmatta?
En badrumsmatta är gjord för att ligga direkt utanför duschen eller badkaret och är utformad för att fånga upp fukt och förhindra att du halkar och är oftast gjord av bomullsfrotté, liknande en tjock handduk.
Abyss dubbelbadkarsmatta
Abyss Double badrumsmatta har exceptionellt god kvalitet med en handgjord finish och finns i mer än 60 färger. De är tillverkad av en frotté med långa öglor. Detta gör denna dubbla badrumsmattan mycket mjuk, hållbar och tåls att tvättas regelbundet. Den är gjord av 100 % Giza egyptisk bomull och kan tillverkas på beställning direkt från fabriken i Portugal.
Habidecor Must Matta
Habidecor Must Bath Rug känns mjuk och lyxig. Den är vävd i Portugal av 100 % egyptisk Giza Long Staple kammad bomull, Must Bath Rug kan kombineras med Abyss Super Pile och Twill Handdukar som finns i 60 fantastiska nyanser. Vita Habidecor Must-badmattor finns vanligtvis i lager. Andra storlekar och färger tillverkas på beställning i Portugal och kräver längre leveranstider.
Habidecor Vändbar matta
Vändbar för maximal mångsidighet! Habidecors vändbara mattan har ett behagligt ”vridmönster” på baksidan. Mattorna är vävd i Portugal av 100 % Giza egyptisk kammad bomull.
Habidecor À La Carte matta
Om du föredrar en ren, solid, korthårig matta som är mjuk, bekväm och resistent! Då ska du titta på Habidecor À La Carte-mattan som är 1/2″ tjock och vävd i Portugal. Detta är en badrumsmatta som fungerar som ett förenande designelement för badrummet eller något intilliggande utrymme; bäst av allt, denna mångsidiga matta ser lika hemtrevlig ut i ditt sovrum eller hall som den gör i ditt badrum.
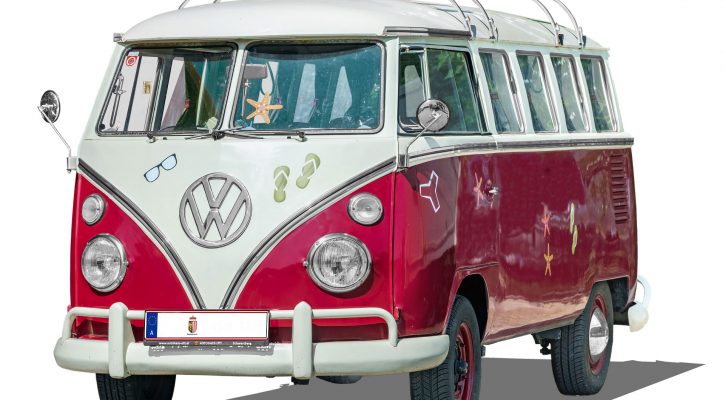
Vill du bygga en egen husbil? Här kommer några tips på hur du väljer inredning till sin skåpbil!
February 9, 2022
Har du någonsin drömt om att leva skåpbilslivet? Många bygger sig en egen inredning till sin skåpbil för att få husbilen mer personligt, och så blir det billigare också. Det är inte helt ovanligt att göra sig av med sitt hem för att leva husbilsliv i ett par månader innan man har bestämt sig för var man vill bo, särskilt när man går i pension. Man gör sig av med hus och prylar för att vara mer fri och uppleva sådant man tidigare inte har haft tid till att göra. Har man en önskan att flytta långt bort kan det vara en bra lösning att ta riktigt lång semester i sin husbil innan man åker till sin slutdestination. Dessutom har du redan med dig alla prylar du behöver. Väl framme kan man sälja sin husbil, eller använda den till weekendutflykter.
Många spenderar mycket tid på att titta på andra personers husbilsprojekt och deras inredning till skåpbil, för att få inspiration.
Den bästa inredningsinspirationen!
En av de bästa delarna med att planera din husbilslayout är att göra efterforskningar och spendera tid på att se vad andra människor har gjort. Det är viktigt att göra research för att se till att du får något som passar din livsstil och är bekvämt för dig. Förutom det är det viktigt att bestämma vad du ska använda din skåpbil till. Kommer du att bo eller kommer du kanske ska arbeta i den på heltid? Om så är fallet kan ett skrivbord stå högt upp på din prioriteringslista.
Tänk på följande innan du väljer inredning till din skåpbil
– Kommer du att tillbringa mycket tid i städer?
– Är du en hängiven mountainbikeåkare, surfare eller skidåkare?
Allt måste räknas in för att få ut det mest av din husbil.
Ett besök på ett klimatsmart destilleri som drivs med värmepellets.
November 10, 2021
Mellan Gävle och Östersjön finns världens mest klimatsmarta whiskydestilleri. Här framställa Sveriges mest kända whisky, och förutom huvudingredienserna korn, vatten och jäst spelar värmepellets och pelletspanna som står strax intill destilleriet en verkligt viktig roll.
Att framställa whisky är ett sofistikerat hantverk, och varje råvara, funktion och detalj är avgörande för slutresultatet. För att höja temperaturen och nå kokpunkten behövs värme. Mycket värme. Ett trettiotal meter från destilleriet står därför en rejält stor pelletspanna som eldas med värmepellets och som värmer upp det vatten som pumpas in i anläggningen och via värmeväxlare höjer temperaturen vid kokningen.
Från pelletsanläggningen och eldning med värmepellets får man 125-graders vatten som får igång kokningsprocessen vid destilleringen. Det heta vattnet ger också en jämn temperatur genom hela kokningsprocessen, vilket ger korta koktider och en bättre slutprodukt.
Pelletsanläggningen som ligger i närheten av destilleriet medför stora fördelar både ekonomiskt och driftsmässigt för Mackmyra, samtidigt som det går det helt i linje med företagets sätt att se på hållbarhet och innovation. Pannan eldas med värmepellets och fungerar enligt samma princip som fjärrvärme; alltså ett slutet system där uppvärmt vatten pumpas in i anläggningen, och via en värmeväxlare sedan höjer temperaturen precis lagom mycket till processen.
För Mackmyras del startade allt med att åtta tidigare studiekamrater var på fjällsemester tillsammans. Där och då väcktes idén om att göra en svensk whisky, baserad på svenska råvaror. Det lade grunden till Mackmyra som startade 1999. Och förutsättningarna att göra whisky i Sverige är goda. Kornet är bra, liksom vattnet. På Mackmyra strävar man efter att tillverka whisky på ett så modernt, effektivt och miljövänligt sätt som möjligt. Och det är för att kunna göra det som man har byggt världens mest klimatsmarta destilleri.
BAKGRUND
Den pelletsanläggning som levererar 125-graders hetvatten till Mackmyra Whiskys destilleri byggdes av KLM Energi & Mekanik, Norrtälje. Pannan levererades av Danstoker och brännaren av Linka.
What’s art and what’s just stuff?
March 25, 2020

This seems to be the everlasting question in the art world. How do we deicide what’s good and what’s not? What is high art, street art and what’s just plain rubbish? Looking at what’s already done plants, cutlery, machines, broken glass, books and traffic cones can all be art. Put in the right context, in the right venue, in front of the right people we can be convinced that almost anything is worth our time, admiration and money.
Simultaneously an object can be beautiful or interesting without being art. Schuchart maskin is a Swedish machine company that for over one hundred years have provided machines and tools for the Scandinavian industrial business. The products they produce are obviously first and foremost supposed to be functional, sturdy, and safe. They are however, in many cases, also beautiful. With intricate and obviously very well thought out design, they are like little sculptures. Modern art often features robots or similar electronic gadgets that appear to have a practical purpose, with flashing lights or moving parts, so why can’t it be the other way around?
Now, I understand that this is a somewhat odd approach to take and I’m sure many would say with outmost certainty that machinery, bolts and screws are not art. However, our view of what is to be considered expectable and awe worthy decorations have and will continue to change. From wall paintings and frescoes, to 3D-printed sculptures and holograms our idea of what art should and can be have made quite a journey. The materials and inspirations that will be used to decorate the world around us is bound to continue to change and evolve, probably faster and more dramatically than ever before. I for one, is really excited to see what the future holds. Let the creativity flow!

A creative day at the golf course
July 18, 2018
This summer is really, really crazy. I mean, the weather is just so hot and dry and it feels like living at the caribbean, but more dry. As a golf players you need to bring at least 2 liters of water to the course, almost as much as there’s water in the water hazards. We played yesterday and our golf balls went straight out of bounds. But after drinking and resting in the shadows, we were on the fairway again, thankfully. But now we need many more balls for the next round.
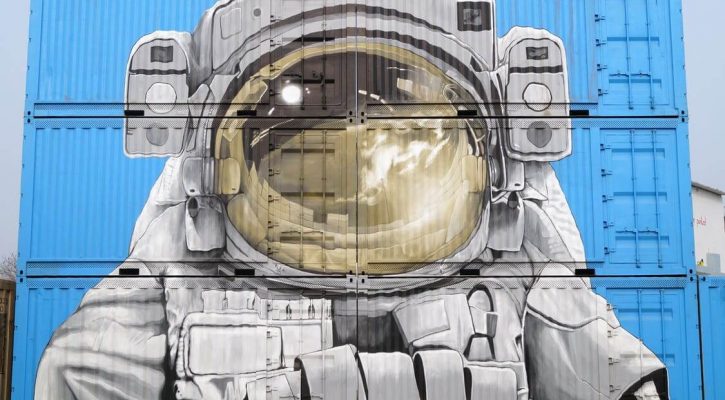
Unconventional Art – What and Where
September 29, 2017
What most likely first comes to mind when you mention art is a drawing, sculpture or some other famous piece of art. Leonardo Da Vinci, Michelangelo and Rembrant are just three examples of masters that create art. They are rightly so celebrated for their genius but art is so much more than that.
We can find art almost everywhere, quite literally. Whenever we humans create something, from a painting to a building or even this blog post. It can become an expression of creativity. This creativity can have both intended and unintended consequences. It it common nowadays within architecture to consider not only the practical use of the buildings but also the impact your design choices have on the overall atmosphere of the building.
One simple example would be how if you are designing buildings for an amusement park you would not design it in the same fashion as a hospital. A hospital requires high efficiency and they are therefore quite dull. That is acceptable however as that is their high efficiency is an important feature which highly outweighs the benefits of a better atmosphere.
Art can be the cure
Art may be the cure in cases where high efficiency is required but you still want a nice atmosphere. Maybe not literally in the case of hospital but art can be used to make patients within the healthcare industri feel better. People hate it when hospitals feel sterile, it is off-putting for many. It is therefore important for not only hospital themselves to keep this in mind but also companies that produce medical equipment. You should of course not sacrifice the practical application but do not limit your creativity needlessly. One example of this is Wing Plast, they focus on manufacturing highly efficient and practical medical instruments. At the same time however they don’t limit their creative imagination on how to make their instruments look good at the same time.
It is small details like that which, when amassed, create a better atmosphere. Consider where in your daily life you can apply your imagination and creativity to create some art that betters your daily life.

Where To Find The Best Street Art In Lisbon
December 12, 2016
Lisbon is renowned for the amazing street art to be found at every corner of the city. Anyone that has ever visited Lisbon knows that the city is spread in two
parts, and old classical one and a modern one.